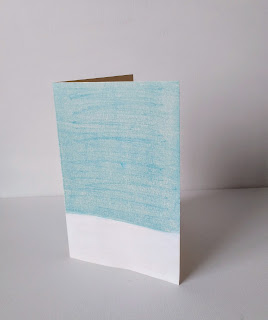
DIY Felt Christmas Tree Card

Here's a DIY Christmas card with lots of twinkle.

You'll need the following supplies to make the Christmas tree card:

One 8.5" x 11" sheet of ivory card stock

One blue chalk pastel

White acrylic paint

Craft felt, 5.5" x 8.5" piece

Small scrap of brown craft felt

Spray fixitive (I used Krylon Kamar Varnish, but hairspray will work, too.)

One gold star 15mm sequin

Multi-color 8mm sequins

Gold #11 seed beads

Red Sharpie

Craft glue

Double-sided tape or glue stick

Christmas tree template (download HERE)

You'll also need the following tools:

Paint brush

Scissors

Straight edge and mat*

Pointed envelope opener*

Beading needle or small needle and thread**

*These items are used to score the card stock along the center where it will be folded. You can just fold the card stock instead, but scoring it first usually makes for a neater folded edge.

**Seed beads are tiny, so, if you don't use a beading needle, check to make sure you can pass your needle through a size 11 seed bead before you begin.

First, score the card stock. Using a straight edge on a hard surface, such as a quilter's mat, run the point of a letter opener all the way down the center.

 
Turn the card stock sheet so that it is horizontally oriented. Starting at the top and using the side of the chalk pastel, color the top 6.25" area with sweeping strokes all the way across the card stock to make the sky. It's not necessary to try to make the horizon line absolutely straight. Chalk pastel rubs off quite a bit. Since it's messy, you might want to wear vinyl gloves for this step.

Paint the bottom of the card stock with white acrylic paint. Do not add water to the paint.

Allow the paint to dry thoroughtly before spraying the card with fixitive. Caution: if you're using the Kamar Varnish or a similar artist's fixitive, follow instructions on the can. Spray outside when there is no wind. Wear a mask and protect your eyes.

Download and print the Christmas tree template. Tape the template to the green felt.

Cut out the tree of green felt and also cut out the small trunk piece of brown felt. If you don't have any brown felt on hand, you can improvise by using a brown Sharpie to color on a scrap of green felt to make the trunk.

Decide where to place the sequins you'd like to use to decorate your tree. If you're concerned about exact placement, make a tiny dot with the tip of a pin for each sequin. Thread your needle with a double thread and knot the end.

To sew a sequin, bring the needle up through the back of the felt, into the center of the sequin; pick up a gold bead with the tip of the needle; and slide gold bead down, into place in the center of the sequin. Take the tip of the needle over the bead to its side and stitch back down through the center hole of the sequin. Secure the thread with a knot on the back.

Add a tiny dot of craft glue on top of the knot for added security. Stitch all of the sequins to the tree in the same manner, and place the gold star sequin at the top of the tree.

Fold the card along the scored line.

Position the tree and trunk in the center of the front of the card. Use double-sided tape or glue stick to adhere the tree and trunk to the the card.

On the inside, write your Christmas greeting with a red Sharpie.

When you're ready to send the card, add your personal notes and signature with the red Sharpie. Use a padded bubble envelope for mailing to protect the sequins and beads. 

Merry Christmas!


How to Make a Needle-Felted Snowman Brooch for the Holidays


To needle felt this cute snowman brooch for the holidays, you'll need the following supplies:

  • 4" x 4" square of white 100% wool felt
  • small amounts of wool roving in white, light brown, black, orange, burgundy, and green
  • metal pinback jewelry component
  • snowman template (click here to download)

You'll also need the following tools:

  1. small, sharp scissors
  2. felting needle
  3. felting pad
  4. clear tape or straight pins
  5. needle and thread
  6. craft glue 

Begin by downloading and printing the template; place the snowman template on the white felt and secure it with either clear tape or straight pins before cutting it out along the outside lines. The lines for the face on the template are there to indicate position, so there's no cutting involved with the face lines.

Start at the top and work down with the needle felting. First, lay a horizontal wisp of light brown roving across the top of the hat and needle felt the top of the hat in place just enough to secure the roving. Wrap the ends around the sides and tack in place on the back with your needle; otherwise, the white sides of the felt will show. As you are making the snowman, you'll be covering the entire front and back of the hat and scarf with roving, so, at this point, felt the roving on top of the hat securely in place, making sure it wraps around to the back. Turn it over and needle felt the roving on the back. Go back and forth between the front and the back until all the roving is securely in place.

Now, add a burgundy strip of roving for the hatband and light brown roving for the brim of the hat in the same manner as you did for the crown, wrapping the roving around the sides of the felt and felting from both front and back alternately. Then cover the white face of the snowman with white roving, but just on the front. There's no need to wrap the roving on the face around the sides of the felt since both the felt and the roving are white. Also, you'll be attaching your brooch pinback to the back top part of the face section, and we want to attach it to felt, rather than a layer of roving.

After you've needle felted the white roving on the face, create the facial features with black roving for the eyes (you can substitute round black eyes for the eye lines and eyelashes, if you prefer), orange roving for the nose, and black roving for the mouth.

Finish the front by needle felting the green stripe first and then burgundy scarf, wrapping the sides and finishing the back as you did with the hat.

When you're finished the back should look something like the photo below. Note that we wrapped the roving all the way around the back for the hat and the scarf but not for the snowman's white face.

Now that you've completed the face, trim any stray strands from the back, front, and sides, and you'll be ready to make your snowman into a brooch. Of course, you could just pin it onto your garment with a safety pin or straight pin, but to make it into a true piece of fiber jewelry, use a pinback. The same technique that I use for putting a pinback on the back of a fabric flower will work with the snowman to turn it into a brooch. See my article "How to Make a Fabric Flower into a Brooch." When you glue your pinback to the back of the snowman, make sure it's centered at the very top part of the white face; do not glue your felt back onto the roving of the hat. Pictured below is the snowman brooch on a vintage green sweater coat.


Tweedy Bird Christmas Decoration

 Make a Christmas Tweedy Bird Tree

Want to make a cute Tweed Bird Christmas Decoration? You'll need the items on the list below to put this crafty DIY project together for the holidays.

Materials

  • terra cotta pot
  • iridescent bronze acrylic paint
  • 1 yard wired Christmas ribbon, 1.5 - 2 inches wide
  • 2 yards double-faced satin ribbon, 1/4 inch wide
  • floral foam
  • small piece of gold tissue paper
  • branch 
  • 9" x 12" red felt
  • 9" x 12" scrap of tweed fabric (with some red in the tweed)
  • black Sharpie
  • brown Sharpie
  • Tweedy Bird template (click here to download)

Instructions

You'll also need some sharp scissors, a paint brush, craft glue, clear tape, and a tapestry needle or needle and thread to match your ribbon.

The first step is to paint the outside of your terra cotta pot with the iridescent bronze paint. This will give it a nice, subtle holiday glow.

Next, paint the upper part of the inside of the pot. It's not necessary to paint it all the way to the bottom because the bottom inside will not show when the project is complete.

Here's the painted pot, which now has a slight glow, thanks to the iridescent paint.

Find a branch that has some smaller branches going out to the side so that you'll have several places to hang your birds. Remove any leaves, and dust it off with a paint brush.

Paint the branch with the iridescent bronze paint, making sure to paint all sides.

Cut a piece of floral foam to fit into the pot, apply some glue to the bottom of the pot, and glue the floral foam in place.

If the floral foam doesn't cover the entire space, put some packing material around it.


Cut a square of gold tissue paper, and place it over the foam. It does not need to be glued.

 Place your branch in the center and push it down into the foam all the way to the bottom of the pot.

Wrap the wired Christmas ribbon around the pot and tie a bow. Trim the ends so that the wires are not sticking out.

Apply a light coat of glue all over the felt and press it onto the tweed fabric. Tweed ravels quite a bit, so the felt helps to stabilize it when you're cutting the birds out.

Download and print the template for the bird and wing. Tape the template to the felt side with clear tape; then cut right through both the tape and the glued felt and tweed. Cut six birds, one at a time, and twelve wings, one at a time, as shown on the template. After you cut out each bird, cut around the outside with sharp scissors to clip any frayed edges on the tweed. Make four or five cuts (the template shows five, but either four or five is OK) as indicated to make the tail feathers.

Draw an eye with the black Sharpie, and color the beak with the brown Sharpie.

 
Glue the wing to the bird, using felt side up for the tweed side of the bird.
Turn the bird over and make the eye with a black Sharpie and color the beak with the brown Sharpie.

 
Glue a tweed wing to the felt side of the bird.

Cut the satin ribbon into twelve-inch pieces, one to hang each bird. Cut the ends of the ribbon diagonally. Thread a tapestry needle with the ribbon, and pull it through both layers of fabric. This is the method I used, but it can be a bit difficult (I really had to tug to work the tapestry needle through the bird), so, if you prefer, thread a needle with thread to match your satin ribbon and simply sew the center of the ribbon to the top of each bird.

If you used the tapestry needle method, slide the needle off the ribbon. Tie a square knot or two overhand knots in the top of the ribbon. You may need to trim the ends, depending on how far down you want your bird to hand on the branch.

Arrange the birds on the branches, and your Christmas Tweedy Bird Tree is all ready for the holidays!


Halloween Felt Table Runner - Easy DIY Project


Here's a quick and easy project for Halloween decorating. We're going to use craft felt to make an orange and black table runner and decorate it with black felt bats. Click HERE to download the bat template so that you can print it.

In addition to the bat template, you'll need one piece of 8" by 36" orange craft felt, one piece of 8" by 36" black craft felt, a few straight pins, scissors, a rotary cutter and a mat (optional), and craft glue. I machine-stitched the runner together, but if you don't have a sewing machine, you could overlap the seams and glue it. The first step is to cut the orange felt in half so that you have two pieces, each 8" by 18".

Next, cut an 8" by 12" section from the black felt.

Pin each orange section to the longer black felt piece, which will be in the center of the table runner.

Use a half-inch seam to sew the orange felt pieces to the black felt center piece. Backstitch to begin if you're machine sewing. (If you're gluing, overlap the seam half an inch with the black felt on the top.)

Sew the seam and backstitch at the end. Clip threads.

Here's the stitched seam. You could use either black or orange thread. I used black so that it would show up in the picture. Sew the other orange felt piece to the black felt center piece in the same manner.


Pin or tape the bat template to the 8" by 12" black felt. If you fold the felt, you can cut two bats at a time. Hold the felt and template firmly as you cut out the bats. Small, sharp scissors work best.

Cut out eight bats.

Arrange the bats on the orange felt any way you like. I put four on each side and made it symmetrical, but you could have more on one side than the other. Below is the left side of the runner I made.

Here's the right side.

This is the completed runner on my dining room table. The light was so bright in the room (you can see its reflection on the table) that it washed out the color in the photo, but it's orange on the sides as shown above.

Here it is on my coffee table. It's longer than the table so the ends droop down, but it looks cute with the vintage ceramic Halloween decorations set in the middle.

More Halloween Ideas